DIY Easy Macramé Wall Hanging, 2 Different Ways Part 1

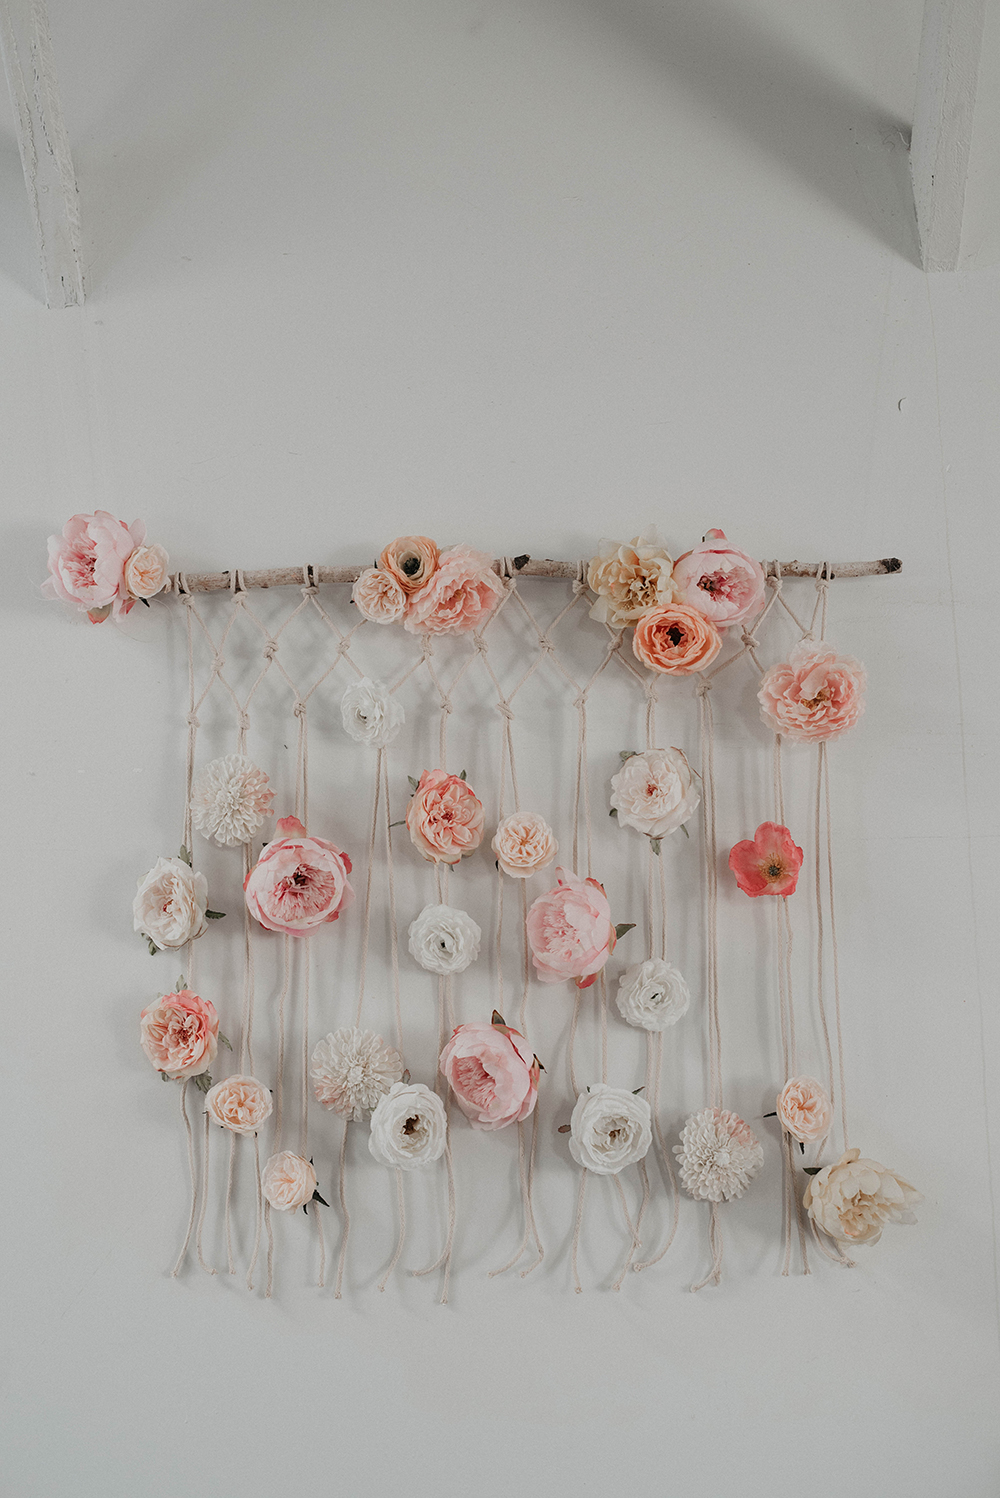
Inspired by today’s Foggy Mountaintop Elopement with Macrame feature, we’re going to share a two part project we’ve been working with Los Angeles floral designer Best Day Ever Floral Design and photographer Jesialex. The first of our DIY Easy Macramé Wall Hanging series makes an ideal addition to any bridal shower, home decor or even kids rooms and nuseries. Decorated with silk flowers from our partner Afloral, this wall hanging DIY is as pretty as they come:

DIY Easy Macramé Wall Hanging, 2 Different Ways - photo Jess Pelphrey  https://ruffledblog.com/diy-boho-wall-hanging/

DIY Easy Macramé Wall Hanging, 2 Different Ways - photo Jess Pelphrey  https://ruffledblog.com/diy-boho-wall-hanging/

DIY Easy Macramé Wall Hanging, 2 Different Ways - photo Jess Pelphrey  https://ruffledblog.com/diy-boho-wall-hanging/

Supplies you’ll need:

DIY Easy Macramé Wall Hanging, 2 Different Ways - photo Jess Pelphrey  https://ruffledblog.com/diy-boho-wall-hanging/

DIY Easy Macramé Wall Hanging, 2 Different Ways - photo Jess Pelphrey  https://ruffledblog.com/diy-boho-wall-hanging/

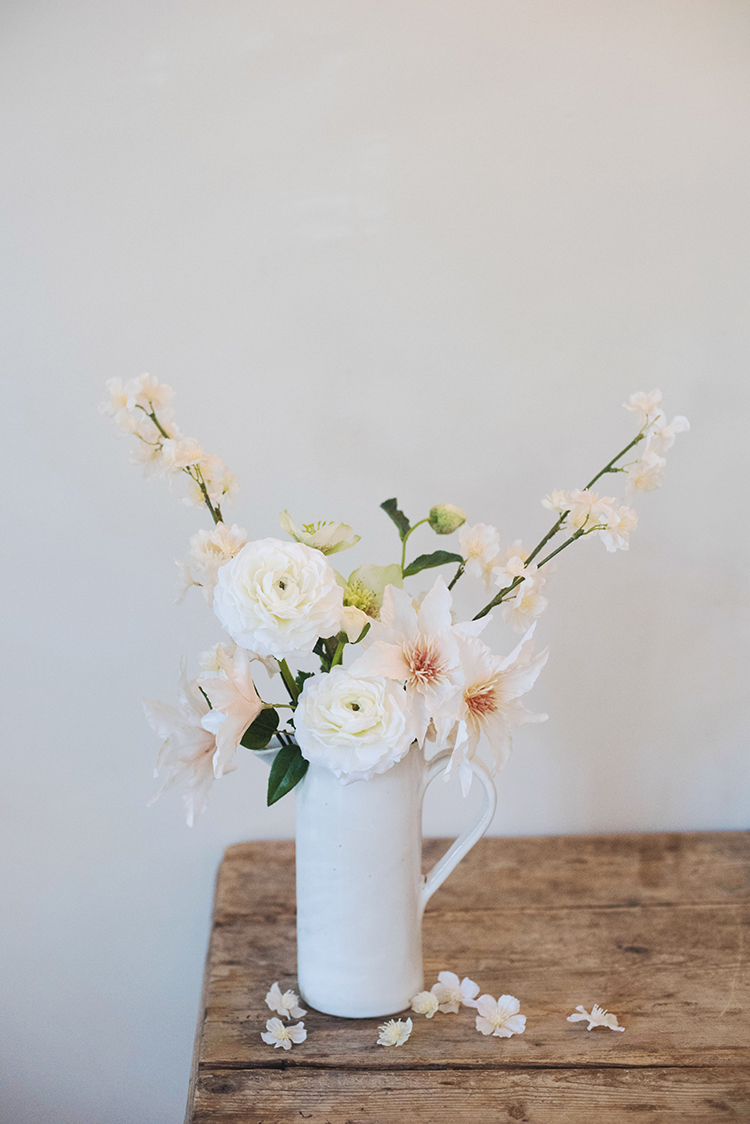
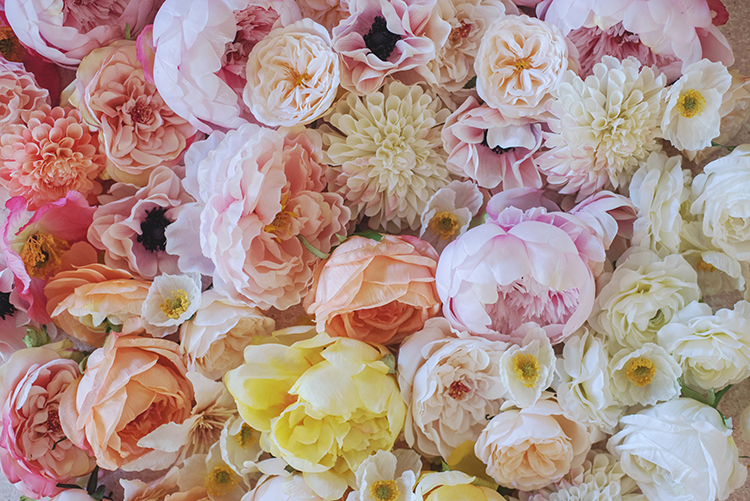
Assorted Silk Flower Recipe for this Wall Hanging:

DIY Easy Macramé Wall Hanging, 2 Different Ways - photo Jess Pelphrey  https://ruffledblog.com/diy-boho-wall-hanging/

DIY Easy Macramé Wall Hanging, 2 Different Ways - photo Jess Pelphrey  https://ruffledblog.com/diy-boho-wall-hanging/

DIY Easy Macramé Wall Hanging, 2 Different Ways - photo Jess Pelphrey  https://ruffledblog.com/diy-boho-wall-hanging/

DIY Easy Macramé Wall Hanging, 2 Different Ways - photo Jess Pelphrey  https://ruffledblog.com/diy-boho-wall-hanging/

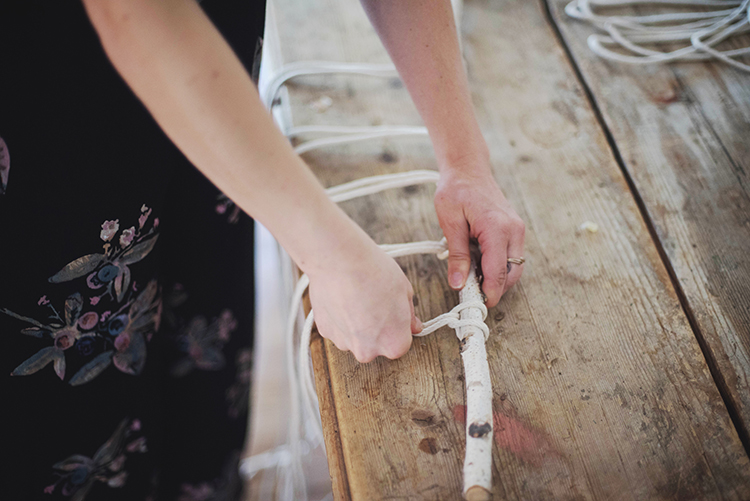
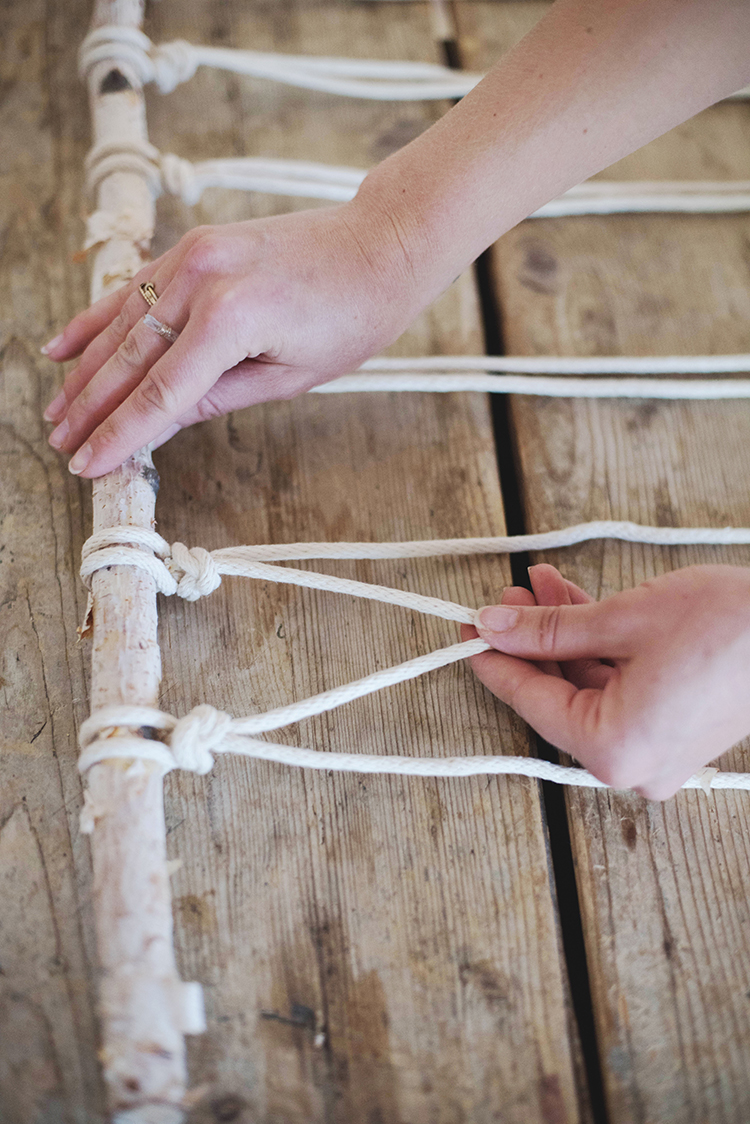
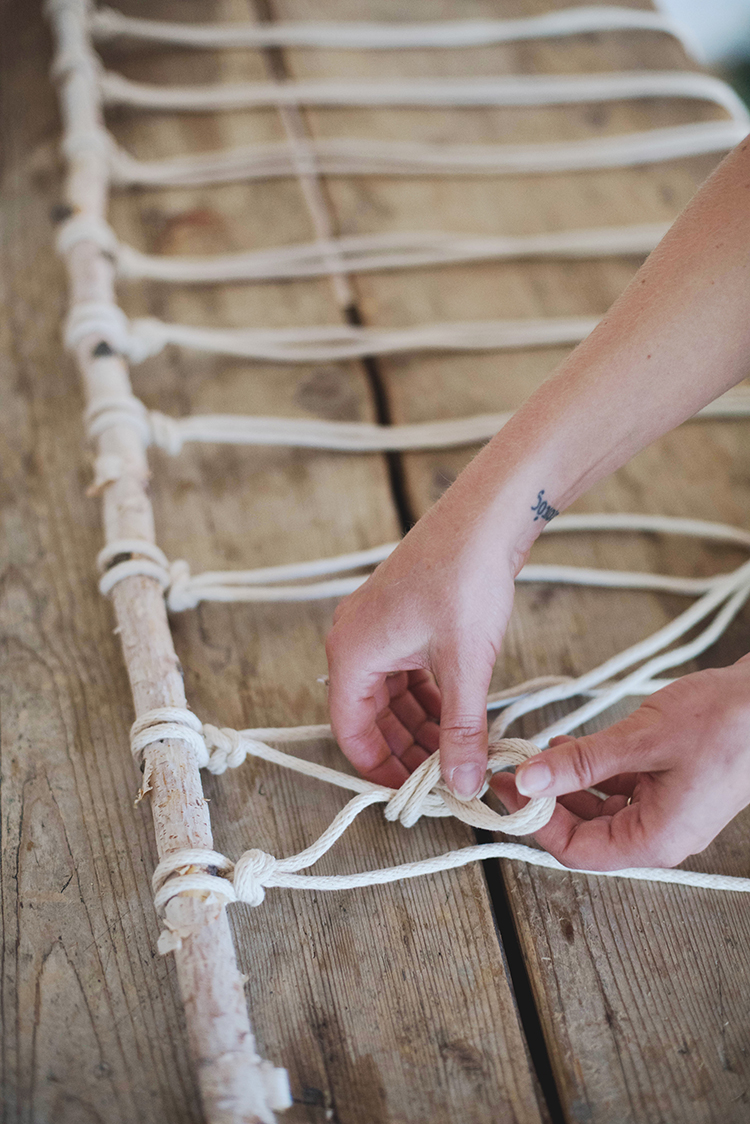
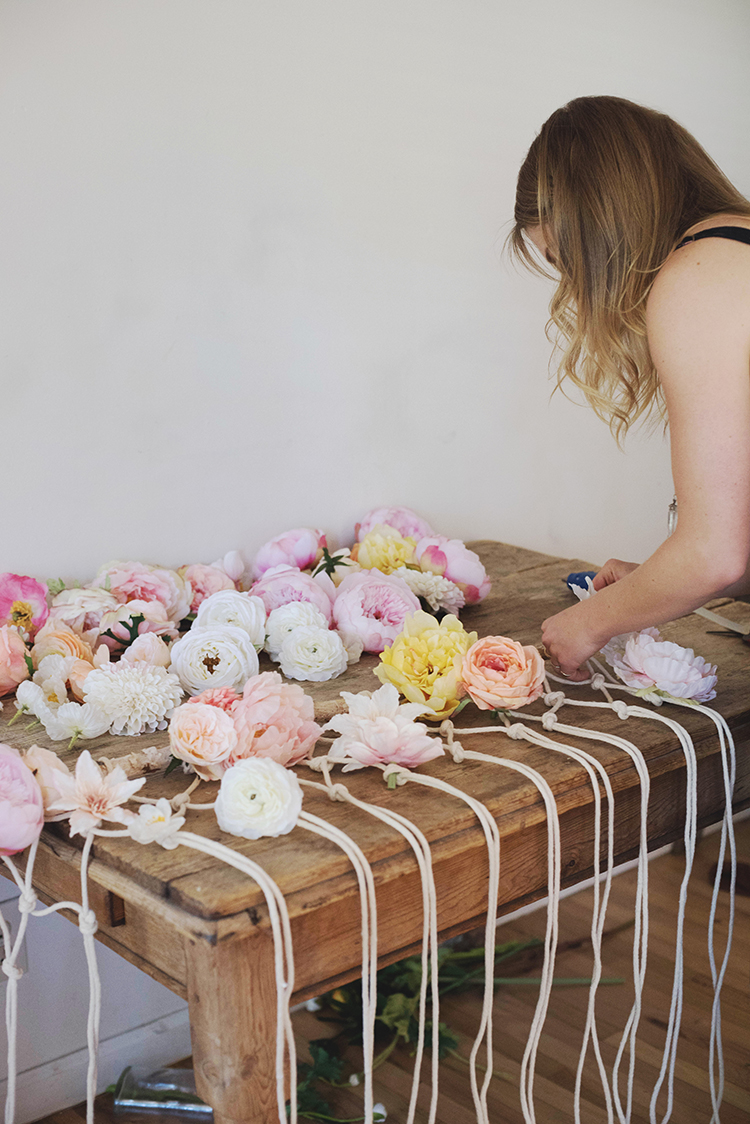
Step One: Once you have your supplies all together you’ll want to start with knotting the rope. Space each knot about 3-4″ away from one another and double up your rope to do a simple loop over the branch and weave the rest of your rope through. You should have an uneven number of knots, and each knot should have two strands of rope hanging from it. Wrap the rope around and tie a knot at the base of each loop.

DIY Easy Macramé Wall Hanging, 2 Different Ways - photo Jess Pelphrey  https://ruffledblog.com/diy-boho-wall-hanging/

DIY Easy Macramé Wall Hanging, 2 Different Ways - photo Jess Pelphrey  https://ruffledblog.com/diy-boho-wall-hanging/

DIY Easy Macramé Wall Hanging, 2 Different Ways - photo Jess Pelphrey  https://ruffledblog.com/diy-boho-wall-hanging/

DIY Easy Macramé Wall Hanging, 2 Different Ways - photo Jess Pelphrey  https://ruffledblog.com/diy-boho-wall-hanging/

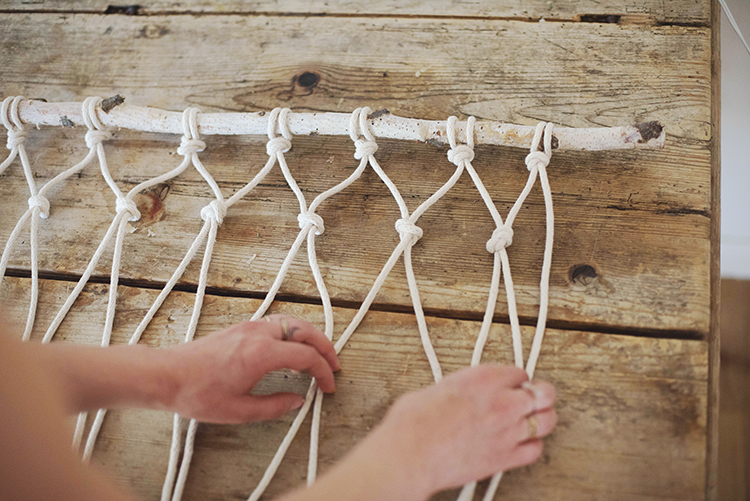
Step Two: Keep your rope strands untangled and begin your knotting process. Take the inner two strands of the first base knots on the left and tie another knot with them. I like to leave about 3-4″ from the base knots to the first row, and then to keep consistent all the way through to create a nice even diamond shape. Continue this through the rest of the rope strands until you reach the other side. Do this again until you have between 3 to 4 rows of knots or unit it looks good to you!

DIY Easy Macramé Wall Hanging, 2 Different Ways - photo Jess Pelphrey  https://ruffledblog.com/diy-boho-wall-hanging/

DIY Easy Macramé Wall Hanging, 2 Different Ways - photo Jess Pelphrey  https://ruffledblog.com/diy-boho-wall-hanging/

DIY Easy Macramé Wall Hanging, 2 Different Ways - photo Jess Pelphrey  https://ruffledblog.com/diy-boho-wall-hanging/

DIY Easy Macramé Wall Hanging, 2 Different Ways - photo Jess Pelphrey  https://ruffledblog.com/diy-boho-wall-hanging/

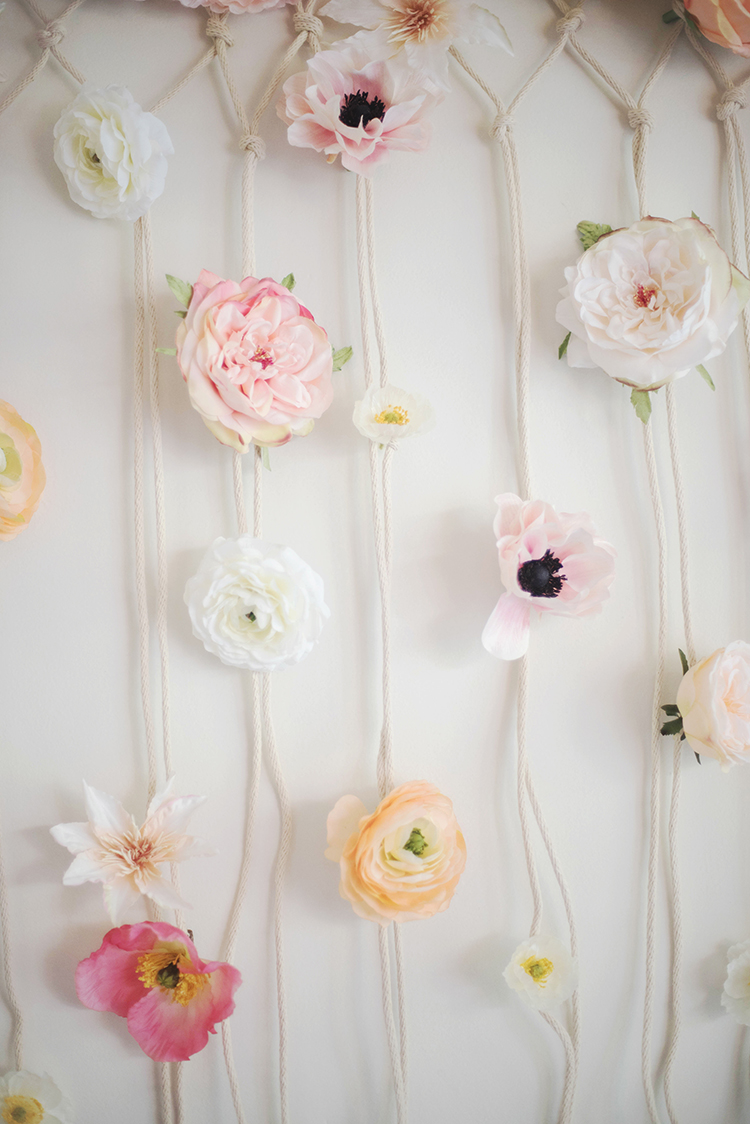
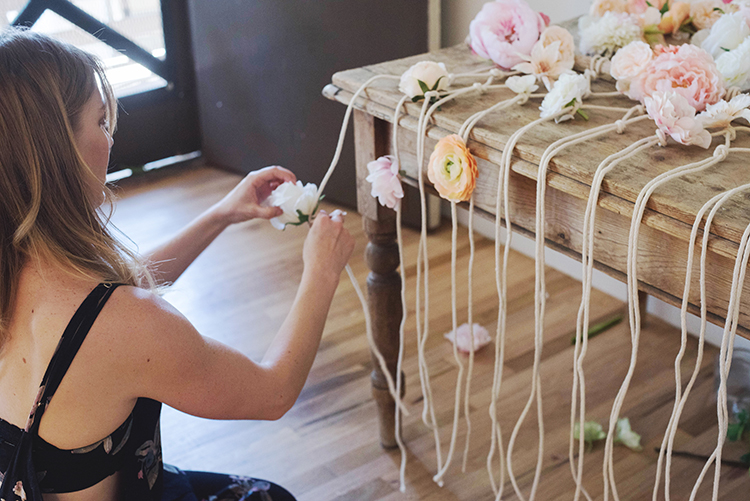
Step Three: Cut the stems of the faux flowers so there is only about 1/2″ left, so that they can be easily glued into the rope.

DIY Easy Macramé Wall Hanging, 2 Different Ways - photo Jess Pelphrey  https://ruffledblog.com/diy-boho-wall-hanging/

DIY Easy Macramé Wall Hanging, 2 Different Ways - photo Jess Pelphrey  https://ruffledblog.com/diy-boho-wall-hanging/

DIY Easy Macramé Wall Hanging, 2 Different Ways - photo Jess Pelphrey  https://ruffledblog.com/diy-boho-wall-hanging/

Step Four: Begin hot glueing the flowers to the top branch for a few bolder accents, then let the flowers trickle down the rest of the hanging ropes. Take each spot on the rope where you want to have a flower and tie a small knot. Place a dot of hot glue on the stem of each bloom and place the stem in the knot and pull tight so that the glue dries to the rope to keep it super secure.

DIY Easy Macramé Wall Hanging, 2 Different Ways - photo Jess Pelphrey  https://ruffledblog.com/diy-boho-wall-hanging/

DIY Easy Macramé Wall Hanging, 2 Different Ways - photo Jess Pelphrey  https://ruffledblog.com/diy-boho-wall-hanging/

DIY Easy Macramé Wall Hanging, 2 Different Ways - photo Jess Pelphrey  https://ruffledblog.com/diy-boho-wall-hanging/

DIY Easy Macramé Wall Hanging, 2 Different Ways - photo Jess Pelphrey  https://ruffledblog.com/diy-boho-wall-hanging/

DIY Easy Macramé Wall Hanging, 2 Different Ways - photo Jess Pelphrey  https://ruffledblog.com/diy-boho-wall-hanging/

DIY Easy Macramé Wall Hanging, 2 Different Ways - photo Jess Pelphrey  https://ruffledblog.com/diy-boho-wall-hanging/

DIY Easy Macramé Wall Hanging, 2 Different Ways - photo Jess Pelphrey  https://ruffledblog.com/diy-boho-wall-hanging/

DIY Easy Macramé Wall Hanging, 2 Different Ways - photo Jess Pelphrey  https://ruffledblog.com/diy-boho-wall-hanging/

DIY Easy Macramé Wall Hanging, 2 Different Ways - photo Jess Pelphrey  https://ruffledblog.com/diy-boho-wall-hanging/

Thanks again to Los Angeles based wedding pros Best Day Ever Floral Design and Jess Pelphrey for sharing + stay tuned for the next one coming up in a bit!

View Comments (2)
  • Hi! I think this is one of the most beautiful macrame pieces I have ever seen. I have the materials to make this but I don’t see any instructions as to how many and how long the cords should be cut. Thanks so much

  • I love this!! Just beautiful! The tutorial is very helpful however I would love to purchase one. Do you make these to sell?

Scroll To Top